어플 주제를 찾고 돌아다니던 중, 픽셀 게임이 눈에 띄어 알게된 라이브러리다. 가지고 놀아보자.
관련 참고 : https://api.flutter.dev/flutter/rendering/CustomPainter-class.html
CustomPainter class - rendering library - Dart API
The interface used by CustomPaint (in the widgets library) and RenderCustomPaint (in the rendering library). To implement a custom painter, either subclass or implement this interface to define your custom paint delegate. CustomPaint subclasses must implem
api.flutter.dev
관련 코드 repo : https://github.com/doyou1/flutter-workspace/tree/master/tistory/custom_painter_sampling
GitHub - doyou1/flutter-workspace
Contribute to doyou1/flutter-workspace development by creating an account on GitHub.
github.com
- 프로젝트 생성 및 TabViewList 설정

/**
 * main.dart
 */
import 'package:flutter/material.dart';
import 'home_screen.dart';

void main() {
  runApp(const MyApp());
}

class MyApp extends StatelessWidget {
  const MyApp({Key? key}) : super(key: key);

  @override
  Widget build(BuildContext context) {
    return MaterialApp(home: HomeScreen());
  }
}

/**
 * home_screen.dart
 */
import 'package:custom_painter_sampling/paint_page/arc_paint_page.dart';
import 'package:custom_painter_sampling/paint_page/circle_paint_page.dart';
import 'package:custom_painter_sampling/paint_page/game_paint_page.dart';
import 'package:custom_painter_sampling/paint_page/image_paint_page.dart';
import 'package:custom_painter_sampling/paint_page/line_paint_page.dart';
import 'package:custom_painter_sampling/paint_page/rectangle_paint_page.dart';
import 'package:custom_painter_sampling/paint_page/rounded_rectangle_paint_page.dart';
import 'package:custom_painter_sampling/paint_page/triangle_paint_page.dart';
import 'package:flutter/material.dart';

class HomeScreen extends StatefulWidget {
  const HomeScreen({Key? key}) : super(key: key);

  @override
  State<HomeScreen> createState() => _HomeScreenState();
}

class _HomeScreenState extends State<HomeScreen> {
  @override
  Widget build(BuildContext context) {
    return DefaultTabController(
      length: 8,
      initialIndex: 0,
      child: Scaffold(
        appBar: AppBar(
          title: Text("CustomPainter Sampling"),
          bottom: TabBar(
            tabs: [
              Tab(icon: Icon(Icons.line_weight), text: "Line"),
              Tab(icon: Icon(Icons.square_outlined), text: "Rectangle"),
              Tab(icon: Icon(Icons.crop_square), text: "Rounded Rectangle"),
              Tab(icon: Icon(Icons.circle_outlined), text: "Circle"),
              Tab(icon: Icon(Icons.architecture), text: "Arc"),
              Tab(icon: Icon(Icons.change_history), text: "Triangle"),
              Tab(icon: Icon(Icons.image), text: "Image"),
              Tab(icon: Icon(Icons.gamepad_outlined), text: "Game"),
            ],
          ),
        ),
        body: TabBarView(
          children: [
            LinePaintPage(),
            RectanglePaintPage(),
            RoundedRectanglePaintPage(),
            CirclePaintPage(),
            ArcPaintPage(),
            TrianglePaintPage(),
            ImagePaintPage(),
            GamePaintPage(),
          ],
        ),
      ),
    );
  }
}

/**
 * line_paint_page.dart
 * rectangle_paint_page.dart
 * rounded_rectangle_paint_page.dart
 * circle_paint_page.dart
 * arc_paint_page.dart
 * triangle_paint_page.dart
 * image_paint_page.dart
 * game_paint_page.dart
 */
import 'package:flutter/material.dart';

class {*}PaintPage extends StatelessWidget {
  const {*}PaintPage({Key? key}) : super(key: key);

  @override
  Widget build(BuildContext context) {
    return Container(
      child: Center(
        child: Text(this.toString()),
      ),
    );
  }
}
- Custom Painter 활용법
LinePaintPage부터 시작해보죠
- LinePaintPage
/**
 * line_paint_page.dart
 */
import 'package:flutter/material.dart';
import '../painter/line_painter.dart';

class LinePaintPage extends StatelessWidget {
  const LinePaintPage({Key? key}) : super(key: key);

  @override
  Widget build(BuildContext context) {
    return Container(
      child: Center(
        child: CustomPaint(
          foregroundPainter: LinePainter(),
        ),
      ),
    );
  }
}
lib/painter/line_painter.dart 파일을 만듭니다.
/**
 * line_painter.dart
 */
import 'package:flutter/material.dart';

class LinePainter extends CustomPainter {
  @override
  void paint(Canvas canvas, Size size) {
  }

  @override
  bool shouldRepaint(covariant CustomPainter oldDelegate) {
    throw UnimplementedError();
  }

}
특정 paint를 그리기 위해선 위와 같이 CustomPainter를 extend해야 합니다.
CustomPainter extend시 paint(), shouldRepaint() 두가지 메서드를 오버라이드(override)해야한다.
paint(), shouldRepaint()는 무슨 메서드일까? CustomPainter 클래스에서 확인해보자.
- paint()

- 주석 읽기
| /// Called whenever the object needs to paint. The given [Canvas] has its /// coordinate space configured such that the origin is at the top left of the /// box. The area of the box is the size of the [size] argument. /// /// Paint operations should remain inside the given area. Graphical /// operations outside the bounds may be silently ignored, clipped, or not /// clipped. It may sometimes be difficult to guarantee that a certain /// operation is inside the bounds (e.g., drawing a rectangle whose size is /// determined by user inputs). In that case, consider calling /// [Canvas.clipRect] at the beginning of [paint] so everything that follows /// will be guaranteed to only draw within the clipped area. /// /// Implementations should be wary of correctly pairing any calls to /// [Canvas.save]/[Canvas.saveLayer] and [Canvas.restore], otherwise all /// subsequent painting on this canvas may be affected, with potentially /// hilarious but confusing results. /// /// To paint text on a [Canvas], use a [TextPainter]. /// /// To paint an image on a [Canvas]: /// /// 1. Obtain an [ImageStream], for example by calling [ImageProvider.resolve] /// on an [AssetImage] or [NetworkImage] object. /// /// 2. Whenever the [ImageStream]'s underlying [ImageInfo] object changes /// (see [ImageStream.addListener]), create a new instance of your custom /// paint delegate, giving it the new [ImageInfo] object. /// /// 3. In your delegate's [paint] method, call the [Canvas.drawImage], /// [Canvas.drawImageRect], or [Canvas.drawImageNine] methods to paint the /// [ImageInfo.image] object, applying the [ImageInfo.scale] value to /// obtain the correct rendering size. void paint(Canvas canvas, Size size); |
Object를 페인트해야 할 때마다 호출됩니다. 주어진 [Canvas]는 원점이 상자의 왼쪽 상단에 있도록 구성된 좌표 공간을 가지고 있습니다. 상자의 면적은 [size] 인수의 크기입니다. 페인트 작업은 주어진 영역 안에 남아 있어야 합니다. 경계 외부의 그래픽 작업은 자동으로 무시되거나 잘리거나 잘리지 않을 수 있습니다. 특정 작업이 범위 안에 있다는 것을 보장하는 것이 때때로 어려울 수 있습니다(예: 사용자 입력에 의해 크기가 결정되는 직사각형 그리기). 이 경우 [paint]의 시작 부분에서 [Canvas.clipRect]를 호출하여 다음 모든 것이 잘린(clipped) 영역 내에서만 그려지도록 보장합니다. 구현에서는 [Canvas.save]/[Canvas.saveLayer] 및 [Canvas.restore]에 대한 호출을 올바르게 페어링하는 데 주의해야 합니다. 그렇지 않으면 이 캔버스의 모든 후속 페인팅이 영향을 받아 잠재적으로 혼란스러운 결과를 초래할 수 있습니다. [Canvas]에 텍스트를 칠하려면 [TextPainter]를 사용하십시오. [캔버스]에 이미지를 칠하려면: 1. 예를 들어 [AssetImage] 또는 [NetworkImage] object에서 [ImageProvider.resolve]를 호출하여 [ImageStream]을 얻습니다. 2. [ImageStream]의 기본 [ImageInfo] object가 변경될 때마다([ImageStream.addListener] 참조), 사용자 정의 페인트 대리자의 새 인스턴스를 만들어 새 [ImageInfo] object를 제공합니다. 3. delegate의 [paint] 메서드에서 [Canvas.drawImage], [Canvas.drawImageRect] 또는 [Canvas.drawImageNine] 메서드를 호출하여 [ImageInfo.image] object를 페인팅하고 [ImageInfo.scale] 값을 적용합니다. 올바른 렌더링 크기를 얻으십시오. void paint(Canvas canvas, Size size); |
말이 잘 이해되나 모르겠다.
- paint 메서드 이해
1. CustomPainter에게 허용되는 레이아웃 영역이 있다!
2. paint 메서드 내부 코드를 통해 영역에 맞게 원하는 그림을 그릴 수 있다. (상황에 따라 그림이 잘릴 수 있다. 주어진 영역에 주의해야한다.)
3. [Canvas.clipRect] 메서드가 정해진 영역내에서 그림을 그리게 해주는 친구다.
4. paint 메서드를 통해 텍스트와 이미지 역시 그릴 수 있다.
- shouldRepaint()

- 주석 읽기
| /// Called whenever a new instance of the custom painter delegate class is /// provided to the [RenderCustomPaint] object, or any time that a new /// [CustomPaint] object is created with a new instance of the custom painter /// delegate class (which amounts to the same thing, because the latter is /// implemented in terms of the former). /// /// If the new instance represents different information than the old /// instance, then the method should return true, otherwise it should return /// false. /// /// If the method returns false, then the [paint] call might be optimized /// away. /// /// It's possible that the [paint] method will get called even if /// [shouldRepaint] returns false (e.g. if an ancestor or descendant needed to /// be repainted). It's also possible that the [paint] method will get called /// without [shouldRepaint] being called at all (e.g. if the box changes /// size). /// /// If a custom delegate has a particularly expensive paint function such that /// repaints should be avoided as much as possible, a [RepaintBoundary] or /// [RenderRepaintBoundary] (or other render object with /// [RenderObject.isRepaintBoundary] set to true) might be helpful. /// /// The `oldDelegate` argument will never be null. bool shouldRepaint(covariant CustomPainter oldDelegate); |
CustomPainter delegate 클래스의 새로운 인스턴스가 [RenderCustomPaint] object에 제공될 때마다 또는 CustomPainter delegate 클래스의 새로운 인스턴스로 새로운 [CustomPaint] 객체가 생성될 때마다 호출됩니다. (후자는 전자의 관점에서 구현되기 때문입니다). 새 인스턴스가 이전 인스턴스와 다른 정보를 나타내는 경우 메서드는 true를 반환해야 하고 그렇지 않으면 false를 반환해야 합니다. 메서드가 false를 반환하면 [paint] 호출이 최적화될 수 있습니다. [shouldRepaint]가 false를 반환하더라도 [paint] 메서드가 호출될 수 있습니다(예: 조상 또는 자손을 다시 칠해야 하는 경우). [paint] 메서드는 [shouldRepaint]가 전혀 호출되지 않고 호출될 수도 있습니다(예: 상자 크기가 변경되는 경우). custom delegate가 가능한 한 다시 그리기를 피해야 하는 특히 비싼 paint function이 있는 경우 [RepaintBoundary] 또는 [RenderRepaintBoundary](또는 [RenderObject.isRepaintBoundary]가 true로 설정된 다른 렌더링 object)가 도움이 될 수 있습니다. 'oldDelegate' 인수는 null이 아닙니다. bool shouldRepaint(covariant CustomPainter oldDelegate); |
- shouldRepaint 메서드 이해
1. 새로운 인스턴스가 제공될 때마다 호출되는 메서드이다.
2. 새로운 그림, 정보를 나타내고 싶다면 true, 그렇지 않으면 false를 반환한다!
3. false를 반환하면, 그림을 다시 그리지 않기때문에 paint가 최적화된다.
4. false를 반환하더라도 상황에 따라 다시 그려지는 경우가 있을 수 있다.
LinePaintPage는 데이터가 바꿔야하는 경우가 없기에 false로 하겠다.
  @override
  bool shouldRepaint(covariant CustomPainter oldDelegate) => false;
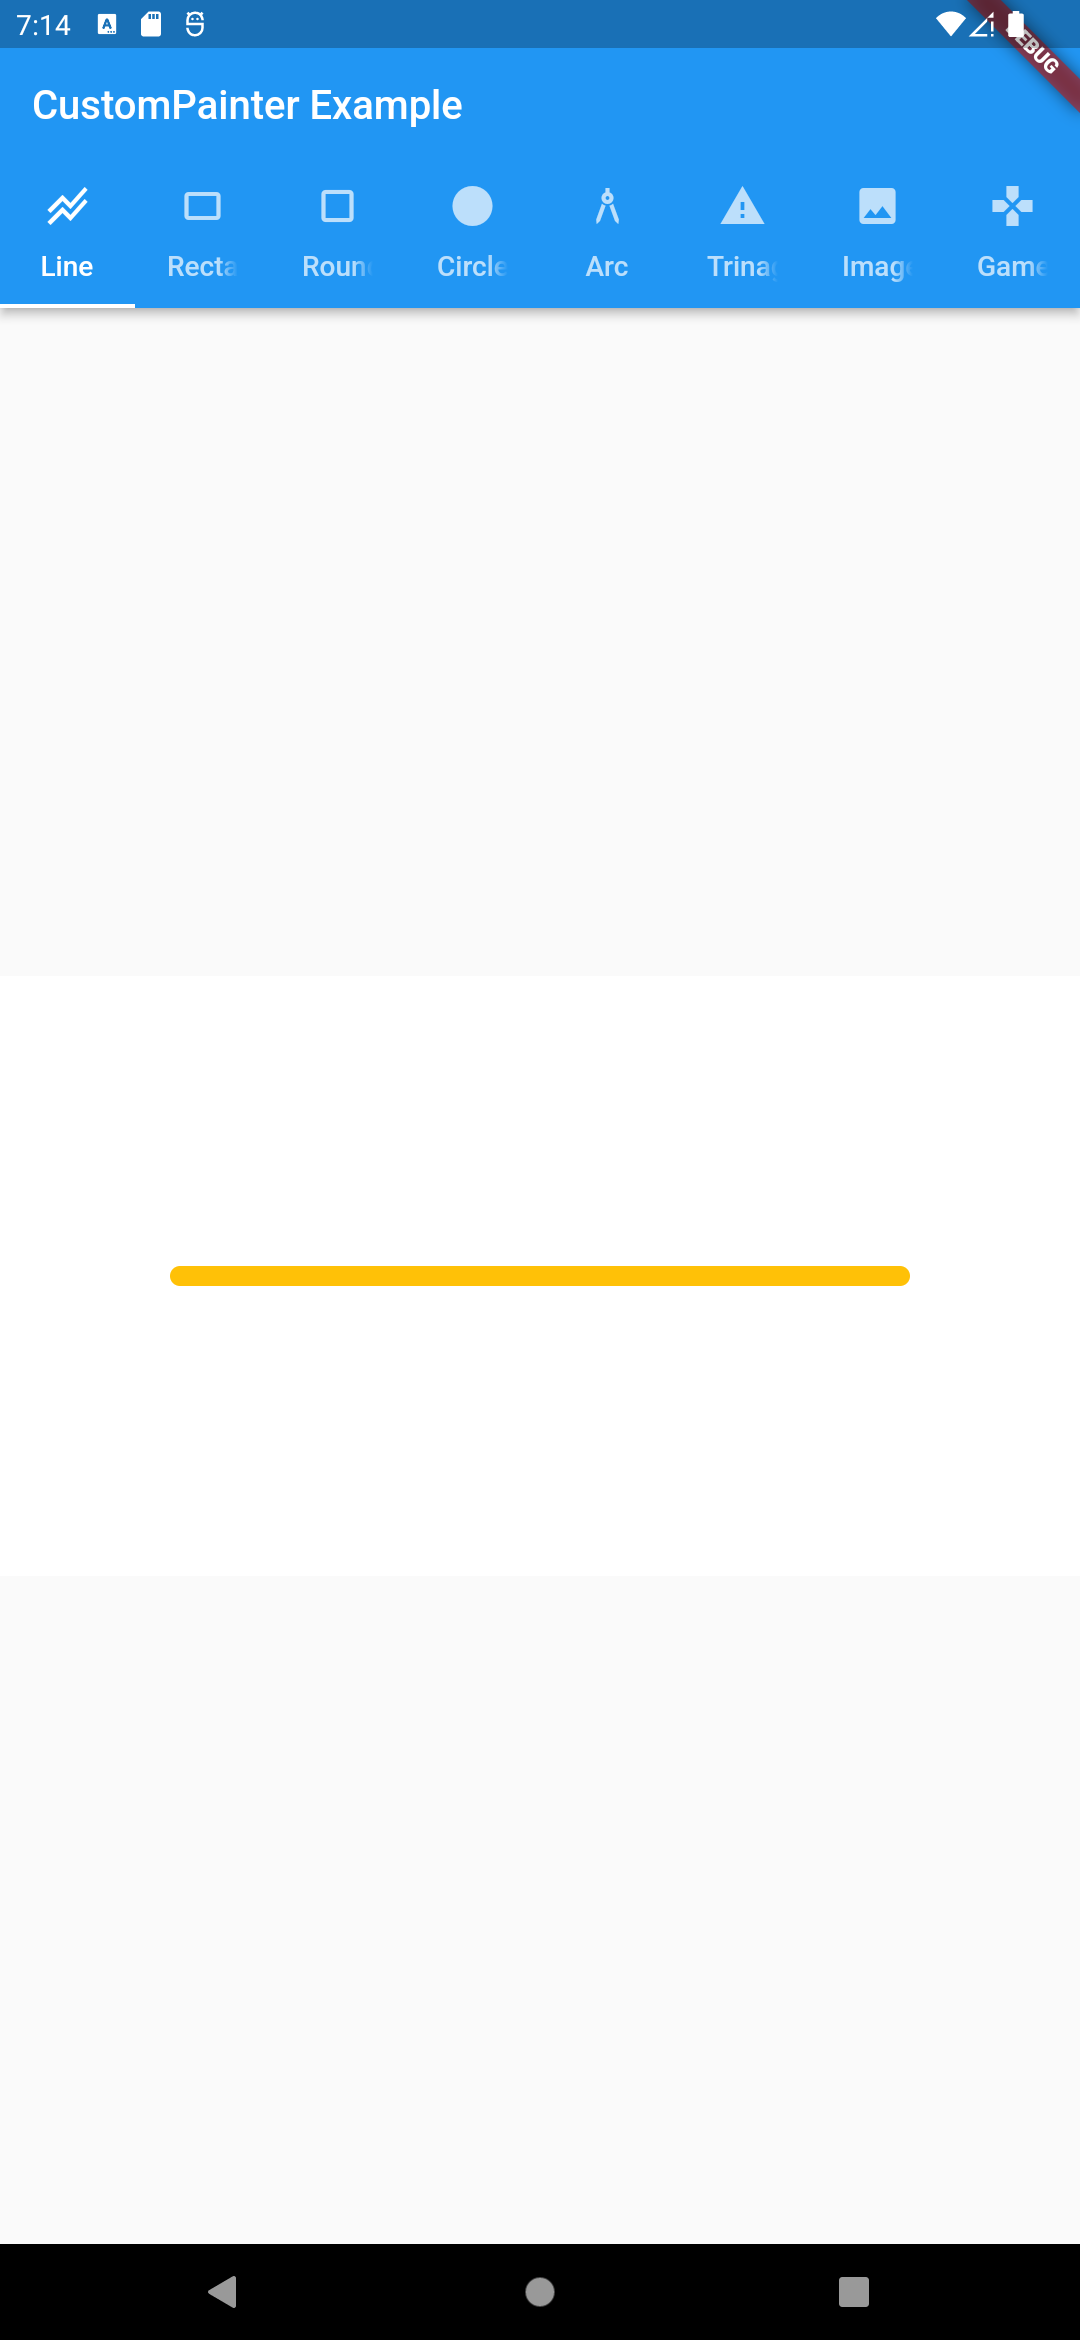
그럼 위 사진과 같이 선을 긋기 위해서 paint() 메서드를 살펴 보겠다.
  @override
  void paint(Canvas canvas, Size size) {
    final paint = Paint()
      ..color = Colors.amber // 선의 색
      ..strokeCap = StrokeCap.round // 선의 stroke를 둥글게
      ..strokeWidth = 10; // 선의 굵기

    canvas.drawLine(
      // a점의 (x, y)
      Offset(0, size.height * 1 / 2),
      // b점의 (x, y)
      Offset(size.width, size.height * 1 / 2),
      paint,
    );
  }
먼저 paint 변수다.
그림판에서 그림을 그리기 위해 연필, 페인트 등을 선택, 선택한 항목의 색, 굵기 등의 스타일 설정을 진행했다고 생각하면 되겠다.
다음은 canvas.drawLine이다.
파라미터를 잘 모르겠다면, 메서드를 확인해보자

- 주석 확인
| /// Draws a line between the given points using the given paint. The line is /// stroked, the value of the [Paint.style] is ignored for this call. /// /// The `p1` and `p2` arguments are interpreted as offsets from the origin. void drawLine(Offset p1, Offset p2, Paint paint) { assert(_offsetIsValid(p1)); assert(_offsetIsValid(p2)); assert(paint != null); _drawLine(p1.dx, p1.dy, p2.dx, p2.dy, paint._objects, paint._data); } |
주어진 페인트를 사용하여 주어진 점 사이에 선을 그립니다. 이 호출에서 [Paint.style] 값은 무시됩니다. 'p1' 및 'p2' 인수는 원점에서 오프셋으로 해석됩니다. void drawLine(Offset p1, Offset p2, Paint paint) { assert(_offsetIsValid(p1)); assert(_offsetIsValid(p2)); assert(paint != null); _drawLine(p1.dx, p1.dy, p2.dx, p2.dy, paint._objects, paint._data); } |
- drawLine 메서드 이해
1. p1을 시작점, p2를 끝점으로 잡고 paint의 스타일을 기준으로 "선"을 그린다.
정도로 이해하면 되겠다.
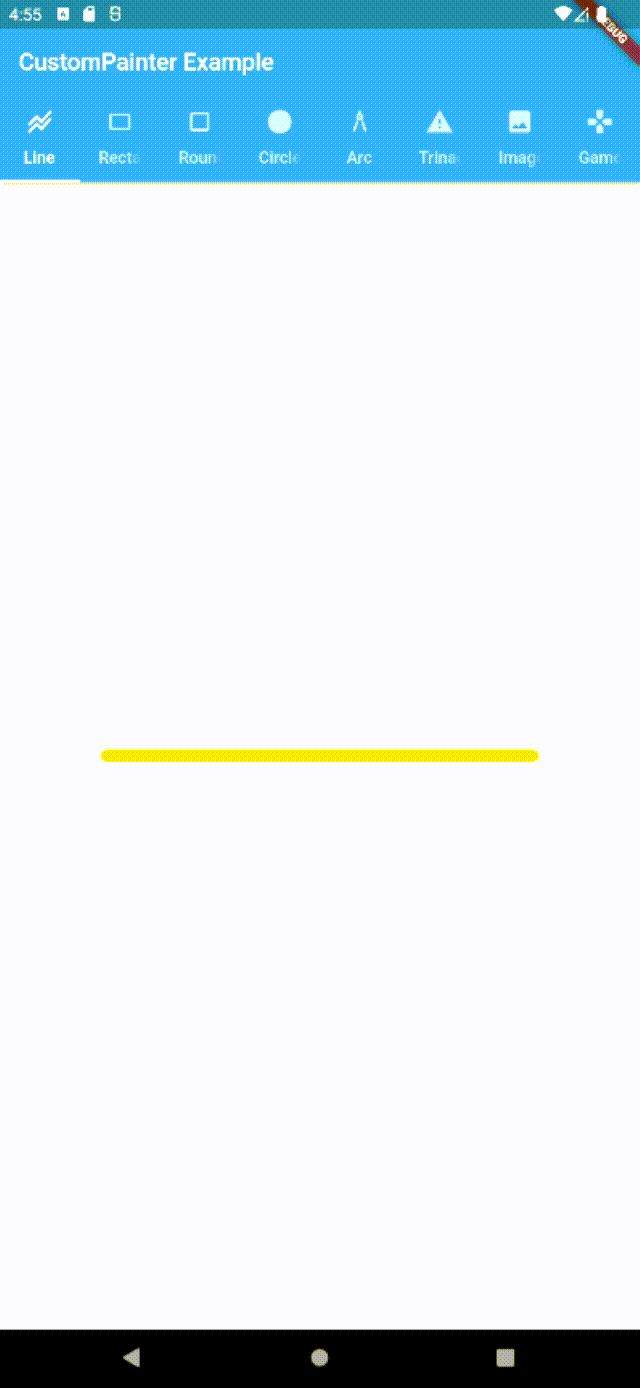
그래서 코드를 저장하고, 에뮬레이터를 돌려보니...

????
띠용?
왜 점이 하나면 찍어 있는 걸까 ? 이유를 찾아보니 size의 문제였다.
@override
  void paint(Canvas canvas, Size size) {
    print("size: $size");	// size: Size(0.0, 0.0)
	.
    .
    .
Size가 (0.0, 0.0)이라고 한다....
그러고보니 LinePainter를 호출하는 위젯에서 명시적으로 크기를 지정한 적이 없다. 돌아가서 다시 진행해보자.
class LinePaintPage extends StatelessWidget {
  const LinePaintPage({Key? key}) : super(key: key);

  @override
  Widget build(BuildContext context) {
    return Container(
      child: Center(
        child: Container(
          width: MediaQuery.of(context).size.width * 0.8,
          height: MediaQuery.of(context).size.height * 0.8,
          child: CustomPaint(
            foregroundPainter: LinePainter(),
          ),
          .
          .
          .
위와 같이 위젯의 크기를 지정해주고 다시 리빌드를 진행해보니!
Good! 성공!! 앱 레이아웃에 내가 원하는대로 선을 그렸다!..(good)
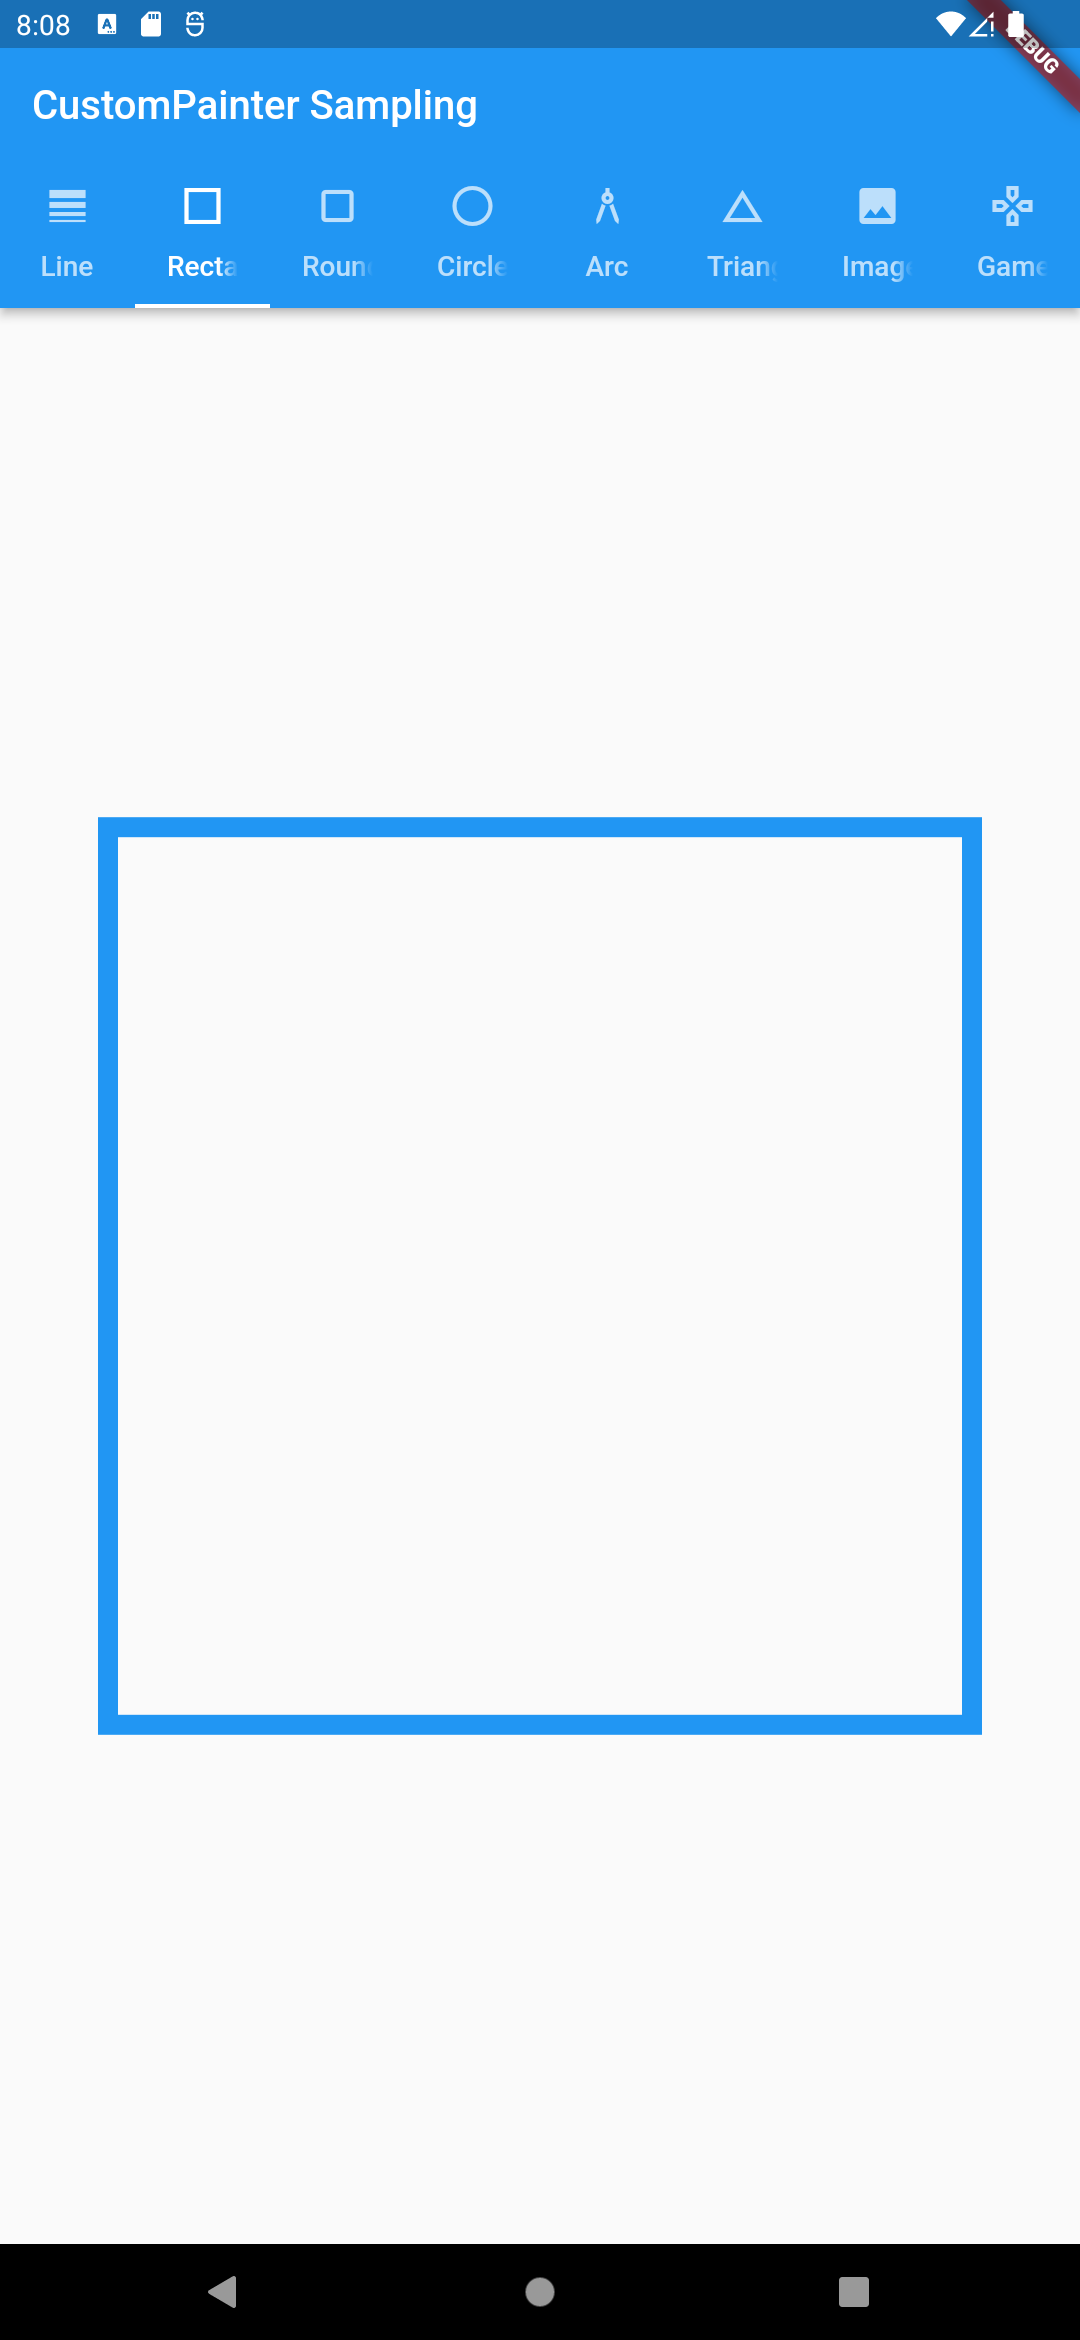
- RectanglePaintPage
import 'package:custom_painter_sampling/painter/rectangle_painter.dart';
import 'package:flutter/material.dart';

class RectanglePaintPage extends StatelessWidget {
  const RectanglePaintPage({Key? key}) : super(key: key);

  @override
  Widget build(BuildContext context) {
    return Container(
      child: Center(
        child: Container(
          width: MediaQuery.of(context).size.width * 0.8,
          height: MediaQuery.of(context).size.height * 0.8,
          child: CustomPaint(
            foregroundPainter: RectanglePainter(),
          ),
        ),
      ),
    );
  }
}
import 'package:flutter/material.dart';
class RectanglePainter extends CustomPainter {
@override
void paint(Canvas canvas, Size size) {
final paint = Paint()
..color = Colors.blue // 선의 색
..strokeWidth = 10 // 선의 굵기
..style = PaintingStyle.stroke; // 안을 채우지않음
// ..style = PaintingStyle.fill; // 안을 채움
// left top(x,y) of rectangle
final a = Offset(0, size.height * 1/4);
// right down(x,y) of rectangle
final b = Offset(size.width, size.height * 3/4);
final rect = Rect.fromPoints(a, b);
canvas.drawRect(
rect,
paint,
);
}
@override
bool shouldRepaint(covariant CustomPainter oldDelegate) => false;
}
| /// Draws a rectangle with the given [Paint]. Whether the rectangle is filled /// or stroked (or both) is controlled by [Paint.style]. void drawRect(Rect rect, Paint paint) { assert(_rectIsValid(rect)); assert(paint != null); _drawRect(rect.left, rect.top, rect.right, rect.bottom, paint._objects, paint._data); } |
주어진 [Paint]로 직사각형을 그립니다. 사각형이 채워지거나 또는 채워지는지 여부(또는 둘 다)는 [Paint.style]에 의해 제어됩니다. |
- RoundedRectanglePaintPage
import 'package:custom_painter_sampling/painter/rounded_rectangle_painter.dart';
import 'package:flutter/material.dart';

class RoundedRectanglePaintPage extends StatelessWidget {
  const RoundedRectanglePaintPage({Key? key}) : super(key: key);

  @override
  Widget build(BuildContext context) {
    return Container(
      child: Center(
        child: Container(
          width: MediaQuery.of(context).size.width * 0.8,
          height: MediaQuery.of(context).size.height * 0.8,
          child: CustomPaint(
            foregroundPainter: RoundedRectanglePainter(),
          ),
        ),
      ),
    );
  }
}
import 'package:flutter/material.dart';
class RoundedRectanglePainter extends CustomPainter {
@override
void paint(Canvas canvas, Size size) {
final paint = Paint()
..color = Colors.blue // 선의 색
..strokeWidth = 10 // 선의 굵기
..style = PaintingStyle.stroke; // 안을 채우지않음
// ..style = PaintingStyle.fill; // 안을 채움
// left top(x,y) of rectangle
final a = Offset(0, size.height * 1/4);
// right down(x,y) of rectangle
final b = Offset(size.width, size.height * 3/4);
final rect = Rect.fromPoints(a, b);
// set round size
final radius = Radius.circular(32.0);
// rect에 radius 추가
canvas.drawRRect(RRect.fromRectAndRadius(rect, radius), paint);
}
@override
bool shouldRepaint(covariant CustomPainter oldDelegate) => false;
}| /// Draws a rounded rectangle with the given [Paint]. Whether the rectangle is /// filled or stroked (or both) is controlled by [Paint.style]. void drawRRect(RRect rrect, Paint paint) { assert(_rrectIsValid(rrect)); assert(paint != null); _drawRRect(rrect._getValue32(), paint._objects, paint._data); } |
주어진 [Paint]로 둥근 사각형을 그립니다. 사각형이 채워지거나 획(또는 둘 다)되는지 여부는 [Paint.style]에 의해 제어됩니다. |

- CirclePaintPage
import 'package:flutter/material.dart';
import '../painter/circle_painter.dart';

class CirclePaintPage extends StatelessWidget {
  const CirclePaintPage({Key? key}) : super(key: key);

  @override
  Widget build(BuildContext context) {
    return Container(
      child: Center(
        child: Container(
          width: MediaQuery.of(context).size.width * 0.8,
          height: MediaQuery.of(context).size.height * 0.8,
          child: CustomPaint(
            foregroundPainter: CirclePainter(),
          ),
        ),
      ),
    );
  }
}
import 'package:flutter/material.dart';
class CirclePainter extends CustomPainter {
@override
void paint(Canvas canvas, Size size) {
final paint = Paint()
..color = Colors.red
..strokeWidth = 10
..style = PaintingStyle.stroke;
// 원 중심(x,y)
final center = Offset(size.width / 2, size.height / 2);
// 반지름
final radius = size.width * 1/3;
canvas.drawCircle(center, radius, paint);
}
@override
bool shouldRepaint(covariant CustomPainter oldDelegate) => false;
}| /// Draws a circle centered at the point given by the first argument and /// that has the radius given by the second argument, with the [Paint] given in /// the third argument. Whether the circle is filled or stroked (or both) is /// controlled by [Paint.style]. void drawCircle(Offset c, double radius, Paint paint) { assert(_offsetIsValid(c)); assert(paint != null); _drawCircle(c.dx, c.dy, radius, paint._objects, paint._data); } |
세 번째 인수에 [Paint]가 지정되어 있고 두 번째 인수에 의해 지정된 반지름이 있는 첫 번째 인수로 지정된 점을 중심으로 원을 그립니다. 원이 채워지거나 획(또는 둘 다)되는지 여부는 [Paint.style]에 의해 제어됩니다. |

- ArcPaintPage
import 'package:flutter/material.dart';
import '../painter/arc_painter.dart';

class ArcPaintPage extends StatelessWidget {
  const ArcPaintPage({Key? key}) : super(key: key);

  @override
  Widget build(BuildContext context) {
    return Container(
      child: Center(
        child: Container(
          width: MediaQuery.of(context).size.width * 0.8,
          height: MediaQuery.of(context).size.height * 0.8,
          child: CustomPaint(
            foregroundPainter: ArcPainter(),
          ),
        ),
      ),
    );
  }
}
import 'package:flutter/material.dart';
class ArcPainter extends CustomPainter {
@override
void paint(Canvas canvas, Size size) {
var paint = Paint()
..color = Colors.orange
..strokeWidth = 10
..style = PaintingStyle.stroke;
/**
* 시작점에서 끝점으로
* 특정 방향으로 선을 그림.(clockwise true: 시계방향, false: 반시계방향)
* radius는 둥그런 정도가 된다.
*/
final arc1 = Path();
// 시작 점(x,y)
arc1.moveTo(size.width * 0.2, size.height * 0.45);
arc1.arcToPoint(
// 끝 점(x,y)
Offset(size.width * 0.8, size.height * 0.45),
radius: Radius.circular(150.0),
// true: 위로 그리기(시계방향), false: 아래로 그리기(반시계방향)
clockwise: false,
);
final arc2 = Path();
// 시작 점(x,y)
arc2.moveTo(size.width * 0.2, size.height * 0.55);
arc2.arcToPoint(
// 끝 점(x,y)
Offset(size.width * 0.8, size.height * 0.55),
// circular(param) param이 커질수록 직선에 가까워짐
// 반지름이 커질수록 선과 같아진다고 생각하자
radius: Radius.circular(150.0),
// true: 위로 그리기(시계방향), false: 아래로 그리기(반시계방향)
clockwise: true,
);
canvas.drawPath(arc1, paint);
canvas.drawPath(arc2, paint);
}
@override
bool shouldRepaint(covariant CustomPainter oldDelegate) => false;
}
- drawPath()
| /// Draws the given [Path] with the given [Paint]. /// /// Whether this shape is filled or stroked (or both) is controlled by /// [Paint.style]. If the path is filled, then sub-paths within it are /// implicitly closed (see [Path.close]). void drawPath(Path path, Paint paint) { assert(path != null); // path is checked on the engine side assert(paint != null); _drawPath(path, paint._objects, paint._data); } |
주어진 [Paint]로 주어진 [Path]를 그립니다. 이 모양이 채워지거나 획으로 채워지는지(또는 둘 다) [Paint.style]에 의해 제어됩니다. 경로가 채워지면 그 안의 하위 경로가 암시적으로 닫힙니다([Path.close] 참조). |
- moveTo()
| /// Starts a new sub-path at the given coordinate. void moveTo(double x, double y) native 'Path_moveTo'; |
지정된 좌표에서 새 하위 경로를 시작합니다. |
- arcToPoint()
| /// Appends up to four conic curves weighted to describe an oval of `radius` /// and rotated by `rotation` (measured in degrees and clockwise). /// /// The first curve begins from the last point in the path and the last ends /// at `arcEnd`. The curves follow a path in a direction determined by /// `clockwise` and `largeArc` in such a way that the sweep angle /// is always less than 360 degrees. /// /// A simple line is appended if either either radii are zero or the last /// point in the path is `arcEnd`. The radii are scaled to fit the last path /// point if both are greater than zero but too small to describe an arc. /// void arcToPoint(Offset arcEnd, { Radius radius = Radius.zero, double rotation = 0.0, bool largeArc = false, bool clockwise = true, }) { assert(_offsetIsValid(arcEnd)); assert(_radiusIsValid(radius)); _arcToPoint(arcEnd.dx, arcEnd.dy, radius.x, radius.y, rotation, largeArc, clockwise); } |
'반지름'의 타원을 설명하기 위해 가중치가 부여된 최대 4개의 원추형 곡선을 추가하고 '회전'(도 단위 및 시계 방향으로 측정)으로 회전합니다. 첫 번째 곡선은 경로의 마지막 점에서 시작하고 마지막 곡선은 'arcEnd'에서 끝납니다. 곡선은 스위프 각도가 항상 360도 미만인 방식으로 '시계 방향' 및 'largeArc'에 의해 결정된 방향으로 경로를 따릅니다. 반지름이 0이거나 경로의 마지막 점이 'arcEnd'이면 간단한 선이 추가됩니다. 반지름은 둘 다 0보다 크지만 호를 설명하기에는 너무 작은 경우 마지막 경로 점에 맞게 크기가 조정됩니다. |

- TrianglePaintPage
import 'package:flutter/material.dart';

import '../painter/triangle_painter.dart';

class TrianglePaintPage extends StatelessWidget {
  const TrianglePaintPage({Key? key}) : super(key: key);

  @override
  Widget build(BuildContext context) {
    return Container(
      child: Center(
        child: Container(
          width: MediaQuery.of(context).size.width * 0.8,
          height: MediaQuery.of(context).size.height * 0.8,
          child: CustomPaint(
            foregroundPainter: TrianglePainter(),
          ),
        ),
      ),
    );
  }
}
import 'package:flutter/material.dart';

class TrianglePainter extends CustomPainter {
  @override
  void paint(Canvas canvas, Size size) {
    final paint = Paint()
      ..color = Colors.green
      ..strokeWidth = 10
      ..style = PaintingStyle.stroke;

    final path = Path();
    path.moveTo(size.width * 1/2, size.height * 1/4); 	// 위점
    path.lineTo(0, size.height * 3/4);					// 왼쪽점
    path.lineTo(size.width, size.height * 3/4);			// 오른쪽점
    path.close();										// 완료

    canvas.drawPath(path, paint);
  }

  @override
  bool shouldRepaint(covariant CustomPainter oldDelegate) => false;
}

- ImagePaintPage
import 'package:custom_painter_sampling/painter/image_painter.dart';
import 'package:flutter/material.dart';
import 'dart:ui' as ui;
import 'package:flutter/services.dart';

class ImagePaintPage extends StatefulWidget {
  const ImagePaintPage({Key? key}) : super(key: key);

  @override
  State<ImagePaintPage> createState() => _ImagePaintPageState();
}

class _ImagePaintPageState extends State<ImagePaintPage> {
  ui.Image? image;


  @override
  void initState() {
    super.initState();

    loadImage("assets/image.jpg");
  }

  Future loadImage(String path) async {
    final data = await rootBundle.load(path);
    final bytes = data.buffer.asUint8List();
    final image = await decodeImageFromList(bytes);

    setState(() => this.image = image);
  }

  @override
  Widget build(BuildContext context) {
    return Center(
      child: image == null
          ? CircularProgressIndicator()
          : Container(
        width: MediaQuery.of(context).size.width * 0.8,
        height: MediaQuery.of(context).size.height * 0.8,
        child: FittedBox(
          child: SizedBox(
            width: image!.width.toDouble(),
            height: image!.height.toDouble(),
            child: CustomPaint(
              painter: ImagePainter(image!),
            ),
          ),
        ),
      ),
    );
  }
}
import 'package:flutter/material.dart';
import 'dart:ui' as ui;
class ImagePainter extends CustomPainter {
final ui.Image image;
const ImagePainter(this.image);
@override
void paint(Canvas canvas, Size size) {
final paint = Paint();
canvas.drawImage(image, Offset.zero, paint);
}
@override
bool shouldRepaint(covariant CustomPainter oldDelegate) => false;
}| /// Draws the given [Image] into the canvas with its top-left corner at the /// given [Offset]. The image is composited into the canvas using the given [Paint]. void drawImage(Image image, Offset offset, Paint paint) { assert(image != null); // image is checked on the engine side assert(_offsetIsValid(offset)); assert(paint != null); _drawImage(image._image, offset.dx, offset.dy, paint._objects, paint._data, paint.filterQuality.index); } |
주어진 [Offset]에서 왼쪽 위 모서리가 있는 캔버스에 주어진 [Image]를 그립니다. 지정된 [Paint]를 사용하여 이미지를 캔버스에 합성합니다. |

요런느낌이지요. 하나하나 적다가 힘들어서 코드와 결과 복붙만 했는데, 하나하나 코드(값) 바꿔보시기 바랍니다.
결과 확인하다보면 감이 잡힐겁니다.
픽셀게임 구현은 다음 포스팅으로 넘기도록 하겠습느디아.
댓글